How to Maintain LVP Flooring After Professional Installation
A simple daily, weekly, monthly, and yearly LVP care routine — what cleaners to use, what to never do, and how to keep both your warranty and your floor's good looks intact.
Luxury vinyl plank is built tough — but it''s not bulletproof. After installing thousands of square feet across Southern California homes, we see the same pattern: floors that get a quick 10-minute weekly routine still look brand new five years in. Floors that get the wrong cleaner, no entry mats, or a steam mop "just once" end up cloudy, scratched, or worse — out of warranty. Here''s the maintenance routine we hand to every client when we finish a job.
The first 72 hours after installation
Your floor needs a short settling-in period before normal use. The exact window depends on your installation type, but these rules apply across the board:
- Stay off glue-down LVP for the first few hours so the adhesive can cure. Your installer will tell you the exact wait time.
- Wait 24 hours before placing heavy furniture (sofas, beds, appliances). The floor needs to acclimate to the room''s temperature and humidity.
- Lift furniture in, never drag it. Even one drag can leave a permanent gouge.
- Skip the wet mop for the first 48 hours. Dry sweep only — the planks are still settling against the expansion gap.
- Keep the room climate-controlled. 60–80°F and 30–60% humidity is the sweet spot.
Daily care (2 minutes)
This is the single most important habit, and it''s the simplest:
- Sweep or dust-mop high-traffic areas. Grit tracked in from outside is the #1 cause of micro-scratches in LVP. A 60-second pass with a microfiber dust mop pulls it up before feet grind it in.
- Wipe spills immediately with a soft cloth. LVP is waterproof on top, but standing water can creep into seams and the expansion gap.
- Use entry mats at every exterior door. One mat outside, one inside. This single change cuts grit damage by more than half.
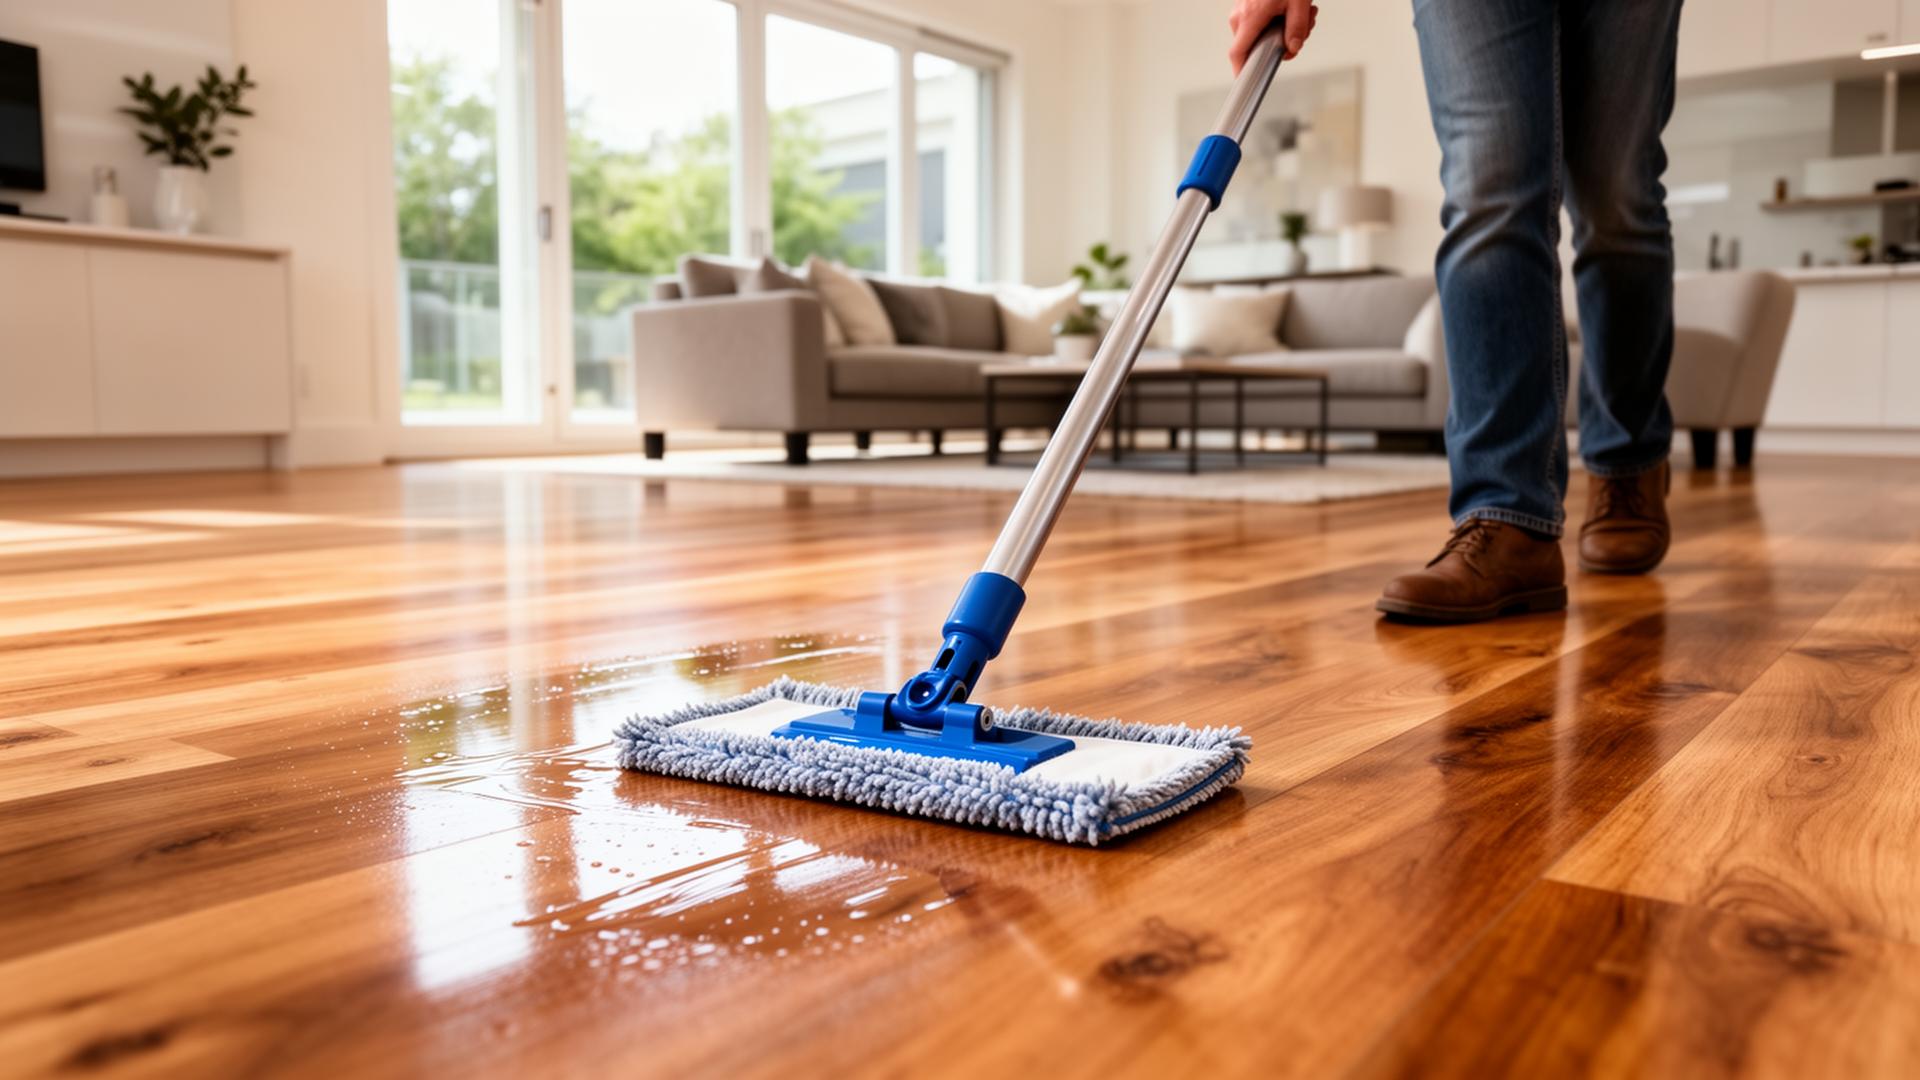
Weekly care (10 minutes)
Once a week, give the floor a real cleaning:
- Vacuum with the hard-floor setting — no rotating beater bar. The spinning brush is designed for carpet; on LVP it scuffs the wear layer and can flick debris hard enough to scratch.
- Damp-mop with a microfiber pad and a pH-neutral, LVP-safe cleaner. "Damp" means wrung out — not dripping. Excess water is your floor''s enemy.
- Dry as you go with a second microfiber pad in higher-traffic areas. No puddles, no streaks.
Look for a cleaner labeled pH-neutral, safe for luxury vinyl, or specifically recommended by your LVP manufacturer. Avoid anything labeled "all-purpose," "heavy-duty," "wax," "polish," "oil soap," or "vinegar-based" — they''re wrong for LVP even when they smell nice.
Monthly care (15 minutes)
Once a month, do a walk-around inspection:
- Check transitions and edges. T-moldings or reducers should still be flush and tight. A loose one is a tripping hazard and an installation issue we''ll fix under workmanship warranty.
- Look under and around appliances. Refrigerators, dishwashers, and washing machines develop slow leaks. Catching one in week one vs. month six is the difference between a wipe-up and a floor replacement.
- Rotate area rugs so any color shift from sunlight stays even.
- Re-felt furniture pads that have worn out. Felt is cheap; gouges aren''t.
- Check expansion gaps at walls. They should still be hidden under baseboards or quarter-round — never packed with debris.
Yearly care (30 minutes)
Once a year — pick a memorable date like New Year''s Day — do a deeper pass:
- Deep clean with the manufacturer-approved cleaner. Same routine, just more thorough, room by room.
- Inspect for cupping, lifting, or seam separation. These are early signs of a moisture problem (a slow leak, a humidity swing, or a subfloor issue from before installation).
- Verify humidity with a cheap hygrometer. 30–60% protects LVP from expansion-contraction stress.
- Tighten any loose transition strips or call us if you''re not comfortable doing it yourself.
- Photograph the floor for your records. Date-stamped photos are gold if a warranty claim ever comes up.
The "Never Do" list
This list comes straight from the fine print of every major LVP warranty. Doing any of these can void your manufacturer warranty and any workmanship warranty:
- Never use a steam mop. Heat + moisture forced into the seams will warp planks and break down adhesives. Steam mops are the single most common cause of voided LVP warranties.
- Never use wax, polish, oil soap, ammonia, bleach, or undiluted vinegar. They strip or cloud the wear layer.
- Never use abrasive scrubbers, steel wool, or melamine ("magic") erasers. They scratch the wear layer.
- Never drag furniture. Always lift, or use felt-padded furniture sliders.
- Never use rubber-backed or latex-backed mats directly on LVP. The rubber reacts with the plank surface and can leave a permanent stain. Use mats labeled "vinyl-floor safe" or "non-staining."
- Never let standing water sit. Wipe immediately.
- Never use a beater-bar vacuum on hard-floor mode. Hard-floor mode means the beater bar should be off, not just slower. If it''s still spinning, switch attachments.
How maintenance protects your warranty
Most LVP manufacturer warranties — and our workmanship warranty — require that you use pH-neutral cleaners, maintain climate control, protect furniture with felt pads, and address leaks promptly. Keep your purchase receipt, your installation paperwork, and a folder of cleaner labels you''ve used. If you ever need to file a claim, that paper trail is what gets it approved instead of denied. We cover the warranty conversation in detail in our guide to what a professional LVP installation warranty should include.
What TRU Installation gives every client
When we finish your installation, we leave you with a one-page care card listing the specific cleaner approved for your LVP line and the do/don''t rules above. We also schedule a 30-day check-in to make sure transitions and edges are still tight. Browse our published rates on the pricing page, or book a free measurement to get started. If you''re still planning your install, our guides on underlayment, subfloor prep, and common installation mistakes are good next reads.
Know your flooring cost in 60 seconds.
Use our published rates to get an itemized estimate — no phone calls, no sales pressure.